
Why start with card
Long before thread portraits, string art was a way to teach mathematics. Mary Everest Boole described curve stitching in The Preparation of the Child for Science (1904): thread laced between holes in card so that straight stitches outline a curve. Her idea was that children could discover the shape for themselves before learning its name.
Curve stitching is still one of the best first projects. It needs no hammer or board, it fits on a sheet of card, and a child can finish a design in one lesson. It also shows the central idea of every string art piece: a curve, or a face, can appear from nothing but straight lines.
What you need
- Thin card, such as cardstock or the back of a cereal box.
- A ruler, a pencil and, for the circle, a protractor or a printed template.
- A push pin or an awl to make the holes. An adult should do this for young children.
- A large, blunt tapestry needle and embroidery thread, or wool for small hands.
- Tape to fix the thread ends on the back.
Stitch a parabola
Draw two lines of the same length that meet at a corner, like the letter L. Mark ten points on each line, one centimetre apart, and make a hole at every mark. Number one line from 1 to 10 starting at the corner. Number the other line from 1 to 10 starting at the far end, so its 10 is at the corner.
Now join each number to the same number on the other line: 1 to 1, 2 to 2, and so on to 10. Stitch up through 1 on the first line and down through 1 on the second. Move to the neighbouring hole on the back, come up through 2 on the second line, and go down through 2 on the first. Long stitches stay on the front, and short hops stay on the back.
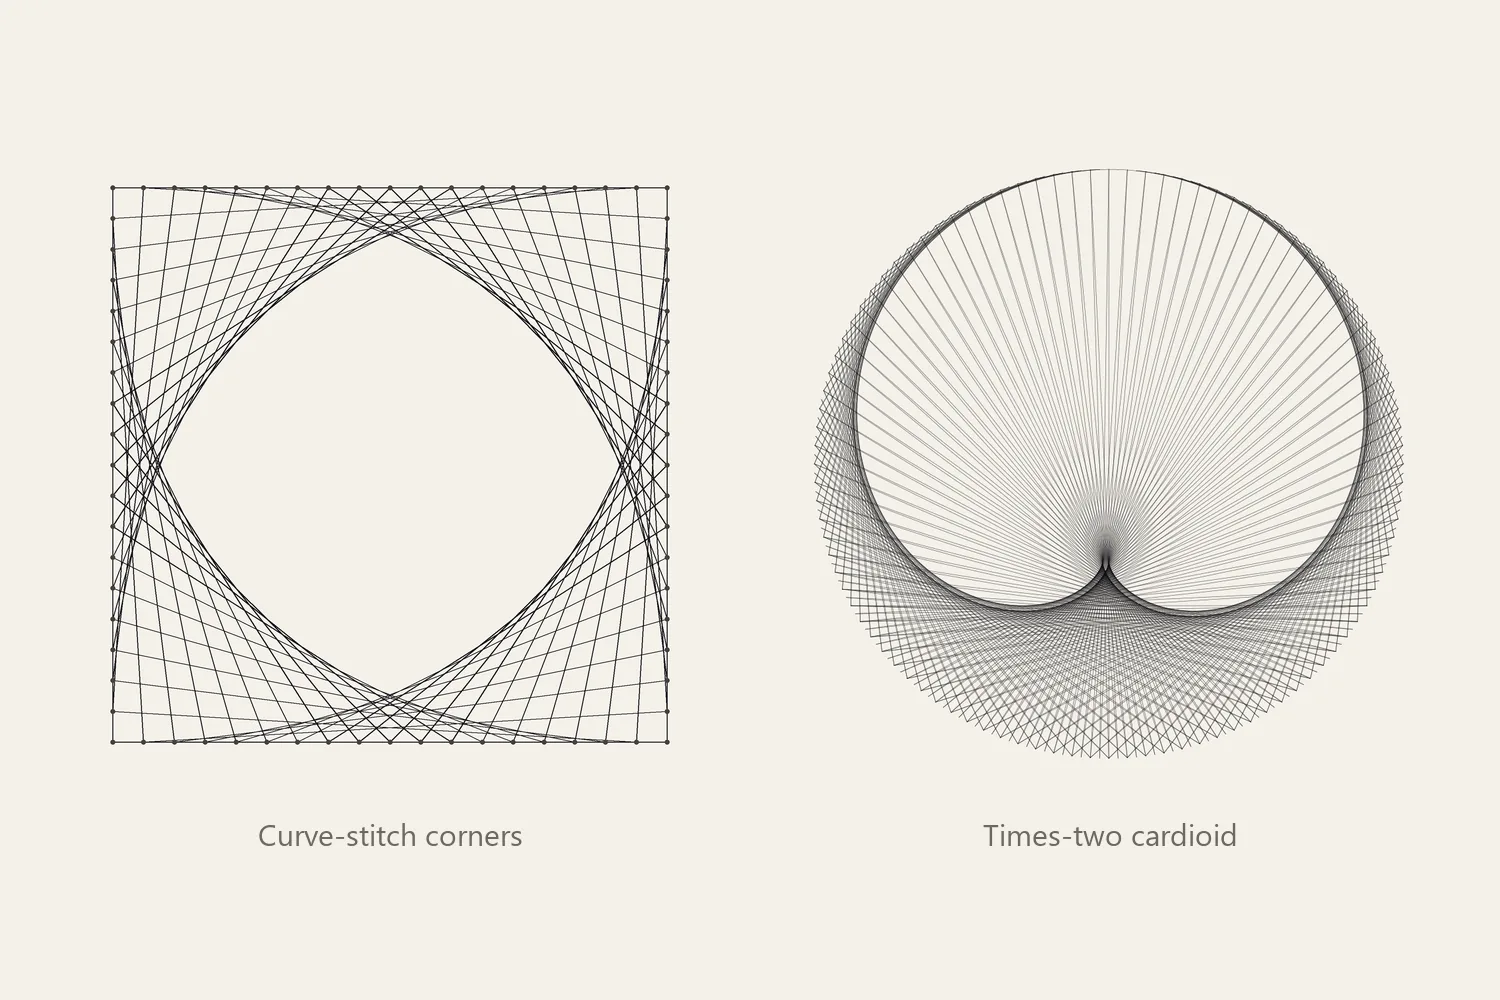
The straight stitches outline a smooth curve: a parabola, which mathematicians call the envelope of the lines. More points closer together make a smoother curve. Repeat the design in all four corners of a square and you get the shape in the figure above.
Circle and cardioid
Draw a circle and mark 36 points around it, one every 10 degrees. Number them 0 to 35. Join every point to the point with double its number: 1 to 2, 2 to 4, 3 to 6. When the double is 36 or more, subtract 36, so 20 joins 4 and 25 joins 14.
When all the chords are in place, a heart-like curve with a single point appears. This is a cardioid. Joining every point to three times its number gives a nephroid, with two points instead: the bright curve that sunlight draws inside a cup of tea has this shape. Children can predict what four times will do before they try it.
A tip for classrooms: print the 36-point circle once, and have pupils prick through the template into their card. Every circle then has the same numbering, and pupils can compare their results.
Take it further
Pins in a cork board are the next step: no hammer, but real tension and a design that can be rewound. After that, a board with nails gives a lasting piece, with an adult handling the hammer and everyone wearing eye protection.
The studio’s geometric studies plan the same figures for a nail board, nail by nail: Cardioid, Nephroid and Curve-stitch corners are under Image → Geometric studies, with no photo needed. The geometry guide shows how to explore them.
Put it into practice
Try your image, inspect the preview, and save the pattern that works for your project.
Open the generator